
Computer Fundamentals: What a Defender Sees When They Look at a Computer
TryHackMe Room Walkthroughs · Room 02
Most cybersecurity content starts with the attack. This room starts with a quieter question. What exactly am I protecting?
TryHackMe's Computer Fundamentals room goes back to the basics. What a computer is made of, how the parts connect, and what happens in the seconds after you press the power button. I went through it with one idea in mind. To look at familiar hardware the way a defender would.
This is room two of my TryHackMe journey, and in this series I document each room in plain language, the way I would explain it to someone who has never opened a computer case.
A quick note: This is a walkthrough of ideas, not answers. I've left out flags and quiz answers on purpose so the room keeps its value for you.
📁 Full lab notes and structured report: github.com/Darajat-Mohammed/thm-blue-team-investigations
The room has three lessons, and they build on each other. Understand what you are securing, learn the parts, then follow the machine from power button to operating system.
Lesson 1: Understanding What I'm Securing
The room opens with an analogy I liked. Before you can protect a castle, you need its floor plan. Where the treasure room is, where the food is stored, who is allowed into which room, and how anyone gets in. A guard who has never seen the castle cannot guard it.
A computer works the same way. Before I can talk about protecting one, I need to know what it's made of, how the pieces connect, and who or what can reach each piece.
Think of it like this. Imagine you're hired as a security guard for a building you've never visited. On your first day, you wouldn't start checking locks. You'd ask for the floor plan first.
Three questions came out of this lesson, and I used them to read everything else in the room.
- What are the parts?
- How are they connected?
- Who or what can reach each part, and how?
What I learned. Security starts with understanding. The floor plan comes before the lock.
Lesson 2: The Building Blocks Inside a Computer
Almost every computer, from a laptop to a huge server, is built from the same set of parts. Each part has one job, and the computer only works when they all do theirs.
The room compares a computer to a human body, and I found the comparison surprisingly useful. Here are the parts, what each one does, and why a defender would care.
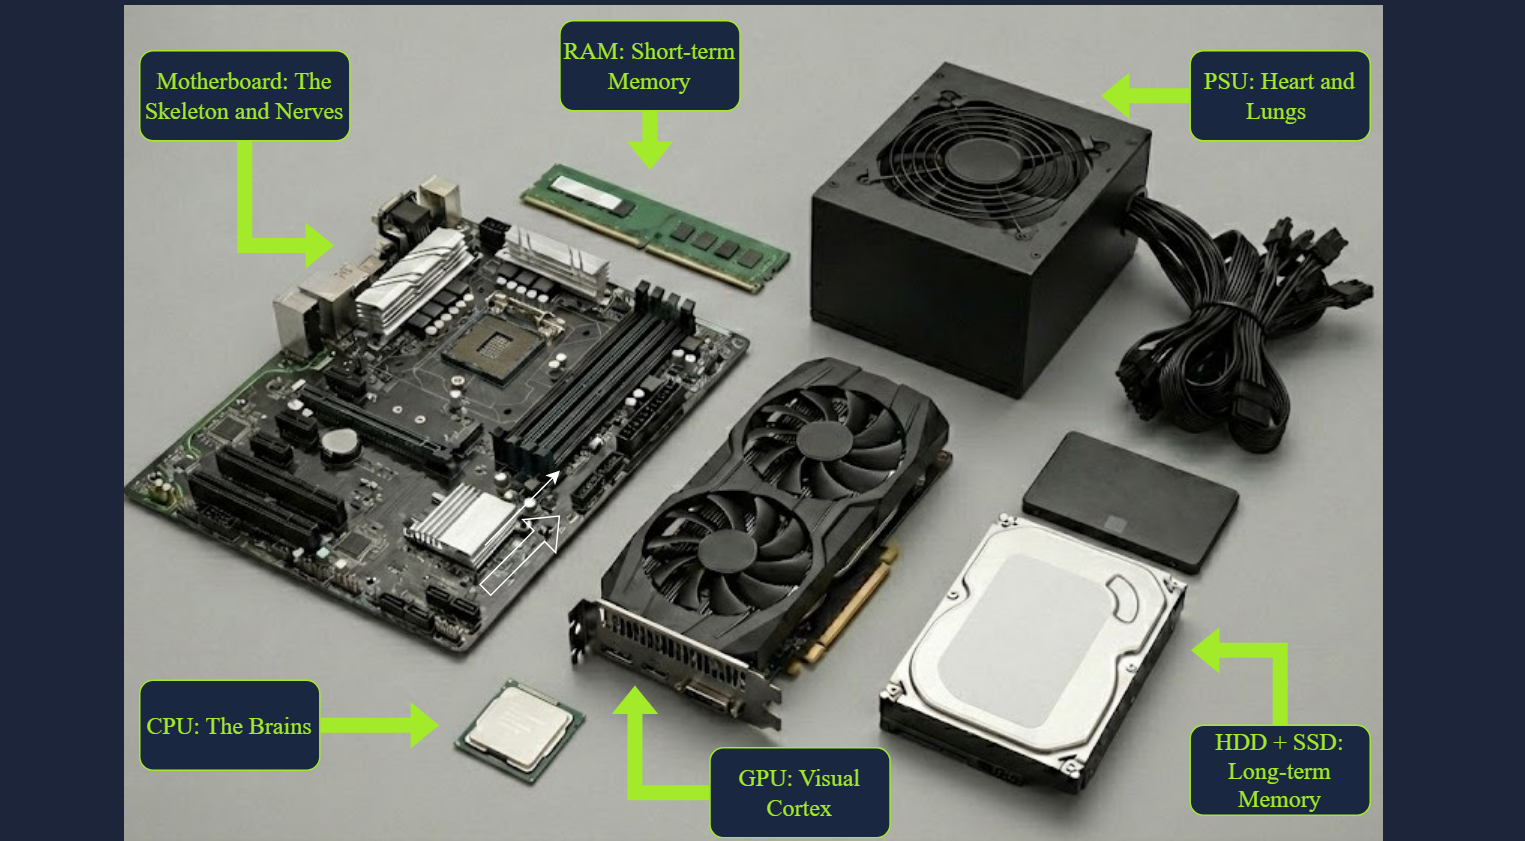
The anatomy of a computer, mapped to its defender relevance.
| Part | What it does | Why a defender cares |
|---|---|---|
| Motherboard | The main circuit board. Every other part plugs into it or connects through it. | Everything passes through it, and the startup software lives on it. |
| CPU | The processor. It follows instructions, and modern ones have several cores working at once. | Every program, good or bad, ends up as instructions for the CPU. |
| RAM | Short-term workspace for whatever the CPU is using right now. It empties when the power goes. | Passwords and keys can sit in it while in use. It disappears on shutdown, so investigators capture it first. |
| SSD or HDD | Long-term storage. An HDD has moving parts. An SSD has none and is much faster. | It's where data stays. Lost or stolen drives are why disk encryption matters. |
| Network adapter | Lets the computer talk to other computers, by cable or Wi-Fi. | The doorway to the network, which is where my networking fundamentals come in. |
| Power supply | Takes power from the wall and feeds each part. | No power means no computer, which is an availability problem. |
| Graphics card | Turns data into the picture on your monitor. | Good at doing many calculations at once, which is why password-cracking tools use GPUs. |
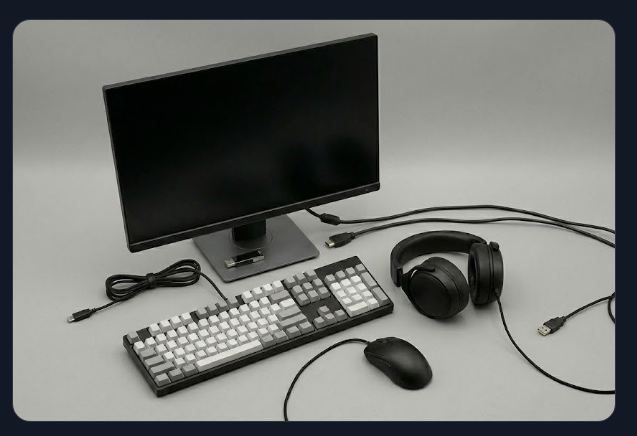
| Input and output devices | Keyboards and mice in. Monitors and speakers out. | Every port is a way in. A USB stick plugged into a machine is a classic way to get something onto it. |
Two of these deserve a closer look.
RAM vs Storage. The Desk and the Filing Cabinet
Think of it like this. RAM is your desk. Storage is your filing cabinet. The desk is small, but everything on it is instantly within reach, and at the end of the day it gets cleared. The cabinet is much bigger, and whatever you file in it is still there tomorrow.
The CPU works with whatever is on the desk, so programs and open files are loaded from storage into RAM while you use them. That's why RAM is called volatile. When the power goes, the desk is wiped, but the cabinet stays as it was.
For storage, an HDD is like a record player. A spinning disc with a moving arm. An SSD is more like a giant USB stick. No moving parts, so it's far quicker.
The Motherboard. Where Everything Meets
Every part in the table connects to the motherboard, through sockets, slots and ports. The CPU sits in its socket. RAM goes into RAM slots. Graphics and network cards plug into expansion slots. Storage connects through SATA or PCI Express. The power supply feeds everything through its own connectors.
The room ended this lesson with a hands-on task. Placing each component into its correct connection on a virtual motherboard. It's a simple exercise, but doing it made the connections stick far better than reading about them did.
Putting the floor plan together. Mapping components on the virtual motherboard.
What I learned. Every part has a job, which means every part is also a place where something can go wrong, or be protected.
Lesson 3: From Power Button to Operating System
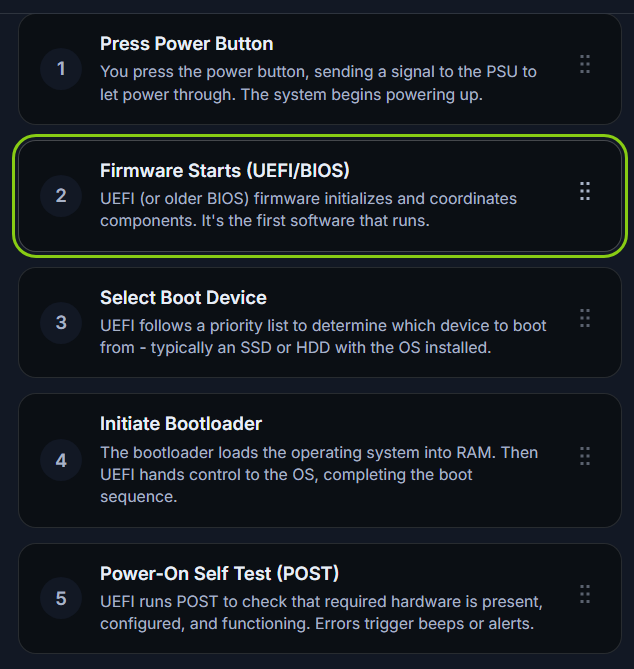
This lesson walks through what happens between pressing the power button and seeing your login screen. It happens in five steps.

The boot sequence, from pressing the button to the operating system taking over.
Think of it like this. When you wake up, your body starts first. Your heart beats and you breathe. You're not fully "you" yet. Then your brain checks that everything works, finds where your memories are stored, and loads them. A computer starts the same way.
Step 1. Press the power button. The power supply starts feeding energy to the parts. Nothing is actually running yet.
Defender's view. Anyone with physical access to the machine has a lot of options.
Step 2. The firmware wakes up. The first thing to run is a small program stored on the motherboard, called the firmware. Its job is to get all the components started before any operating system exists. The modern version is called UEFI. You'll also hear BIOS, which is the older version that does the same job.
Defender's view. The firmware is the first code to run, so everything after it has to trust it. A feature called Secure Boot checks that the startup software is trusted before it's allowed to run.
Step 3. The Power-On Self-Test. The firmware runs a quick health check. It confirms every required part is present, set up correctly and working. If something is wrong, you get a warning, often as beeps or an error message.
Think of it like this. It's like checking you have your keys, phone and wallet before you leave the house.
Step 4. Choosing the boot device. The firmware keeps an ordered list of places to look for the startup instructions. It checks the first one, and if there's nothing there, it moves down the list.
Defender's view. If an attacker can change that order, or plug in a USB stick and boot from it, they can start the computer with their own software instead of yours. This is why firmware settings are often protected with a password.
Step 5. The bootloader takes over. On the chosen device, a small program called the bootloader runs. It loads the core of the operating system into RAM, then hands control of the machine to it.
Defender's view. Malware that hides at this stage, often called a bootkit, starts before the operating system, and before the security tools that run on it.
What I learned. Each step trusts the one before it. The earlier something is tampered with, the harder it is to detect, because everything after it has to trust it. Security professionals call this a chain of trust.
Key Takeaways
| Concept | What it means |
|---|---|
| Castle thinking | You can't defend what you don't understand. The floor plan comes first. |
| Volatile memory | RAM empties when the power goes, so it needs to be captured before shutting a machine down. |
| Storage | Long-term data lives on SSDs and HDDs, which is why disk encryption matters. |
| Ports and adapters | Every connection is a possible way in. |
| UEFI and BIOS | The first software to run, which sets up the hardware. |
| POST | A quick self-check that every required part is present and working. |
| Boot order | The list of places the firmware looks for the operating system. |
| Bootloader | Loads the operating system into RAM and hands over control. |
| Secure Boot | A UEFI feature that checks the startup software is trusted. |
The three questions from Lesson 1 worked for every part and every step.
- What are the parts?
- How are they connected?
- Who or what can reach each one, and how?
Final Thoughts
I came into this room thinking I was revisiting the basics. I came out seeing the same hardware as a map of places to protect.
A motherboard isn't just a circuit board anymore. It's where the firmware lives. RAM isn't just memory. It's where secrets sit while they're being used. The boot process isn't just a startup sequence. It's a chain of trust, and a chain is only as strong as its first link.
The most valuable lesson for me is this. You can't defend what you don't understand, and understanding starts with knowing the parts.
📁 If you want the structured lab report behind this article, with the component reference, boot sequence, defender takeaways, and lessons learned, it's on GitHub: thm-blue-team-investigations
Join the discussion. If you've taken this room or work in the field, I'd like to hear your take. Comment below, or reach out if you want to collaborate on blue-team writeups, Linux security, or detection content. I read every message.
Next in the series: another room in my TryHackMe journey, same approach. Understand first, then defend.
Until then, keep exploring, keep experimenting, keep learning.
About the author
I'm Darajat, a computer science graduate working toward SOC operations, incident response, and defensive security. Through Darajat's Infosec Journal, I learn in public by documenting hands-on TryHackMe blue-team investigations, Linux security walkthroughs, and defensive lab work. You can explore the code, lab notes, and structured reports behind my articles on my GitHub.
I'm open to collaborating on blue-team writeups, detection engineering, and Linux security content. If you're building something in this space and want a second pair of hands, reach out.
Learning platform: TryHackMe
This article is part of my TryHackMe Room Walkthroughs series.
About the author
- Computer Science graduate transitioning into SOC Operations, Infrastructure Security, and Defensive Cyber Operations. Through Darajat’s Infosec Journal, I learn in public by documenting hands-on TryHackMe blue-team investigations, SIEM log analysis, Linux security walkthroughs, and defensive automation scripts. You can explore the code, detection rules, and lab configurations behind my articles on my GitHub profile.
Comments
Join the discussionNo comments yet. Be the first to comment.
TryHackMe Room Walkthroughs: Lab Logs & Analysis
Practical TryHackMe room walkthroughs built on clear methodology and hands-on execution. Every post breaks down the exact commands, network behavior, and security concepts behind the challenge serving as a documented proof of work in defensive and offensive operations. https://tryhackme.com/p/DarajatMohammed?utm_campaign=social_share&utm_medium=social&utm_content=profile&cardVersion=ae1bc697010c&utm_source=copy&share_date=2026-11-15&sharerId=6af0da2554c63fd566a6315d